Automatic Calibration
Switch Automatic Calibration by clicking on ‘Automatic’ at the bottom of the ‘Calibration’ section. The Automatic Calibration page is similar to the Manual calibration page with few differences
To run an automatic calibration, select a calibration algorithm you want to use. Note that the DREAM algorithm is in testing, so only use for experimentation. Select the observation
for which you want to run the calibration.
If you intend to run a multi-site calibration, there is no need to make a selection in the ‘observation selection’ box. However, you will need to check the ‘Multi-Site Calibration’ checkbox and assign weights for each observation in the 'performance index panel' (Figure 18)
You can select an objective function you want to use by selecting it in the ‘Objective Function Selection’ boxes. Be sure to select the correct direction (e.g. Maximise NSE but Minimise RMSE). After entering the maximum number of iterations in the Max Iterations box, you can start Automatic calibration by clicking ‘Calibrate’.
While calibration is running, you can monitor progress in the ‘Monitoring Panel’ by looking at (a) dotty plots (Fig. 13) (b) evolution of best performance index or (Fig. 14) (c) the graph for the best performance (Figure 18).
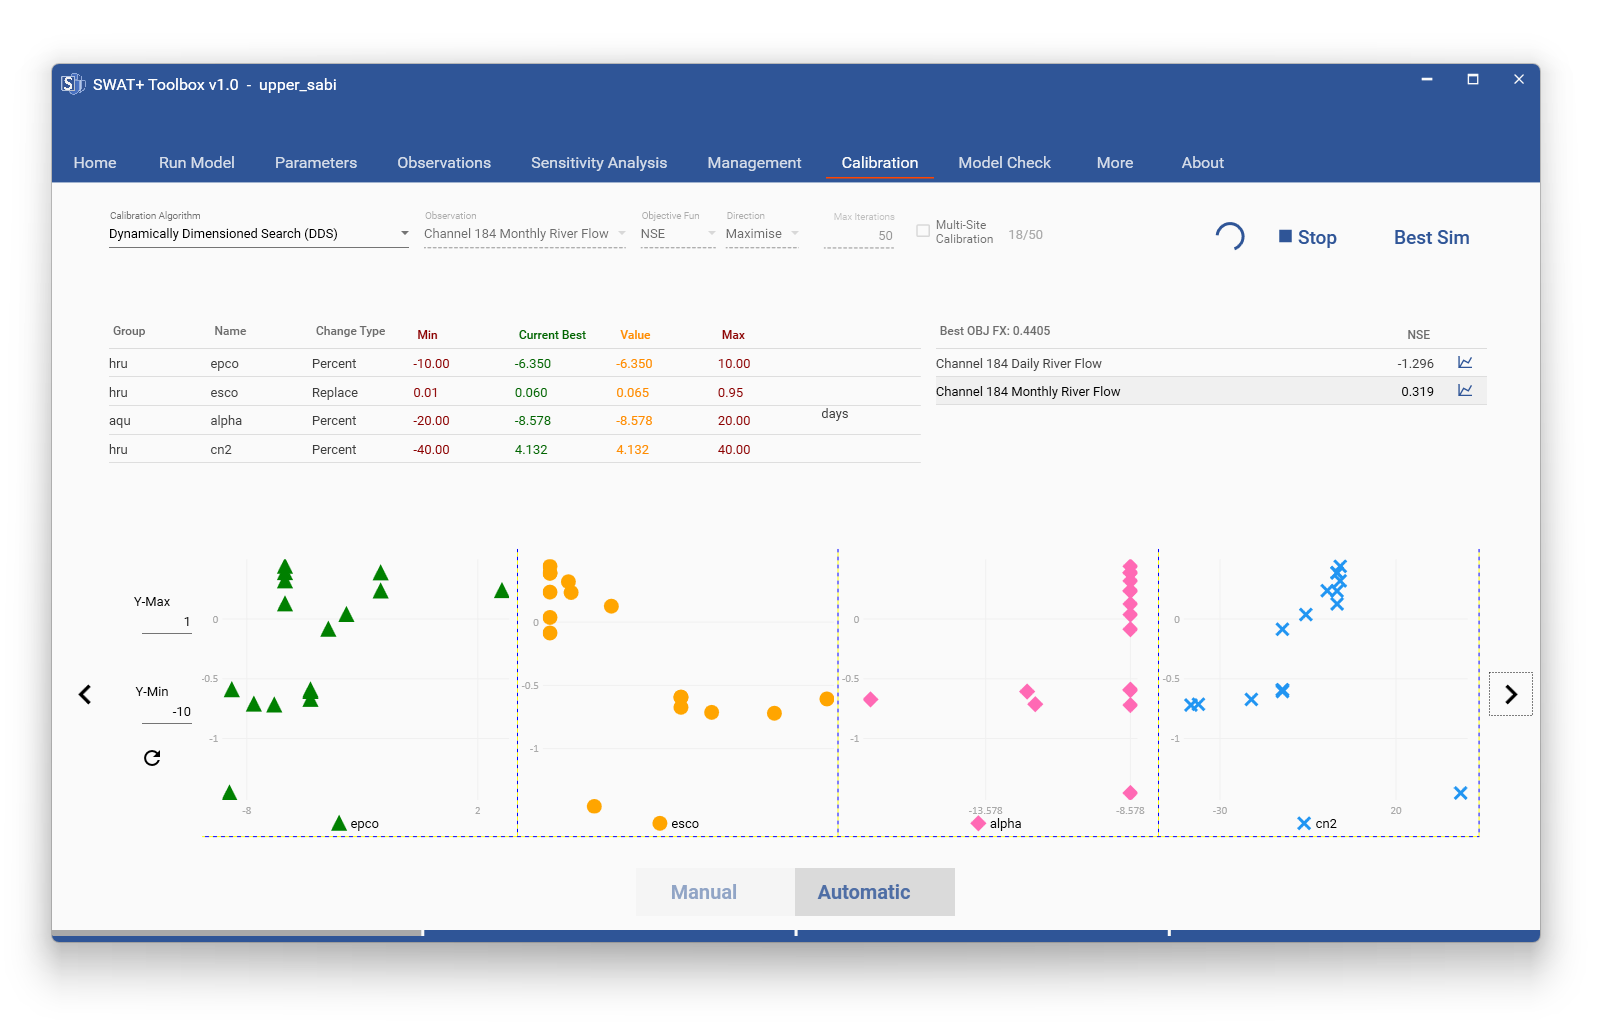
Fig. 13. Dotty plots in the monitoring panel during automatic calibration.
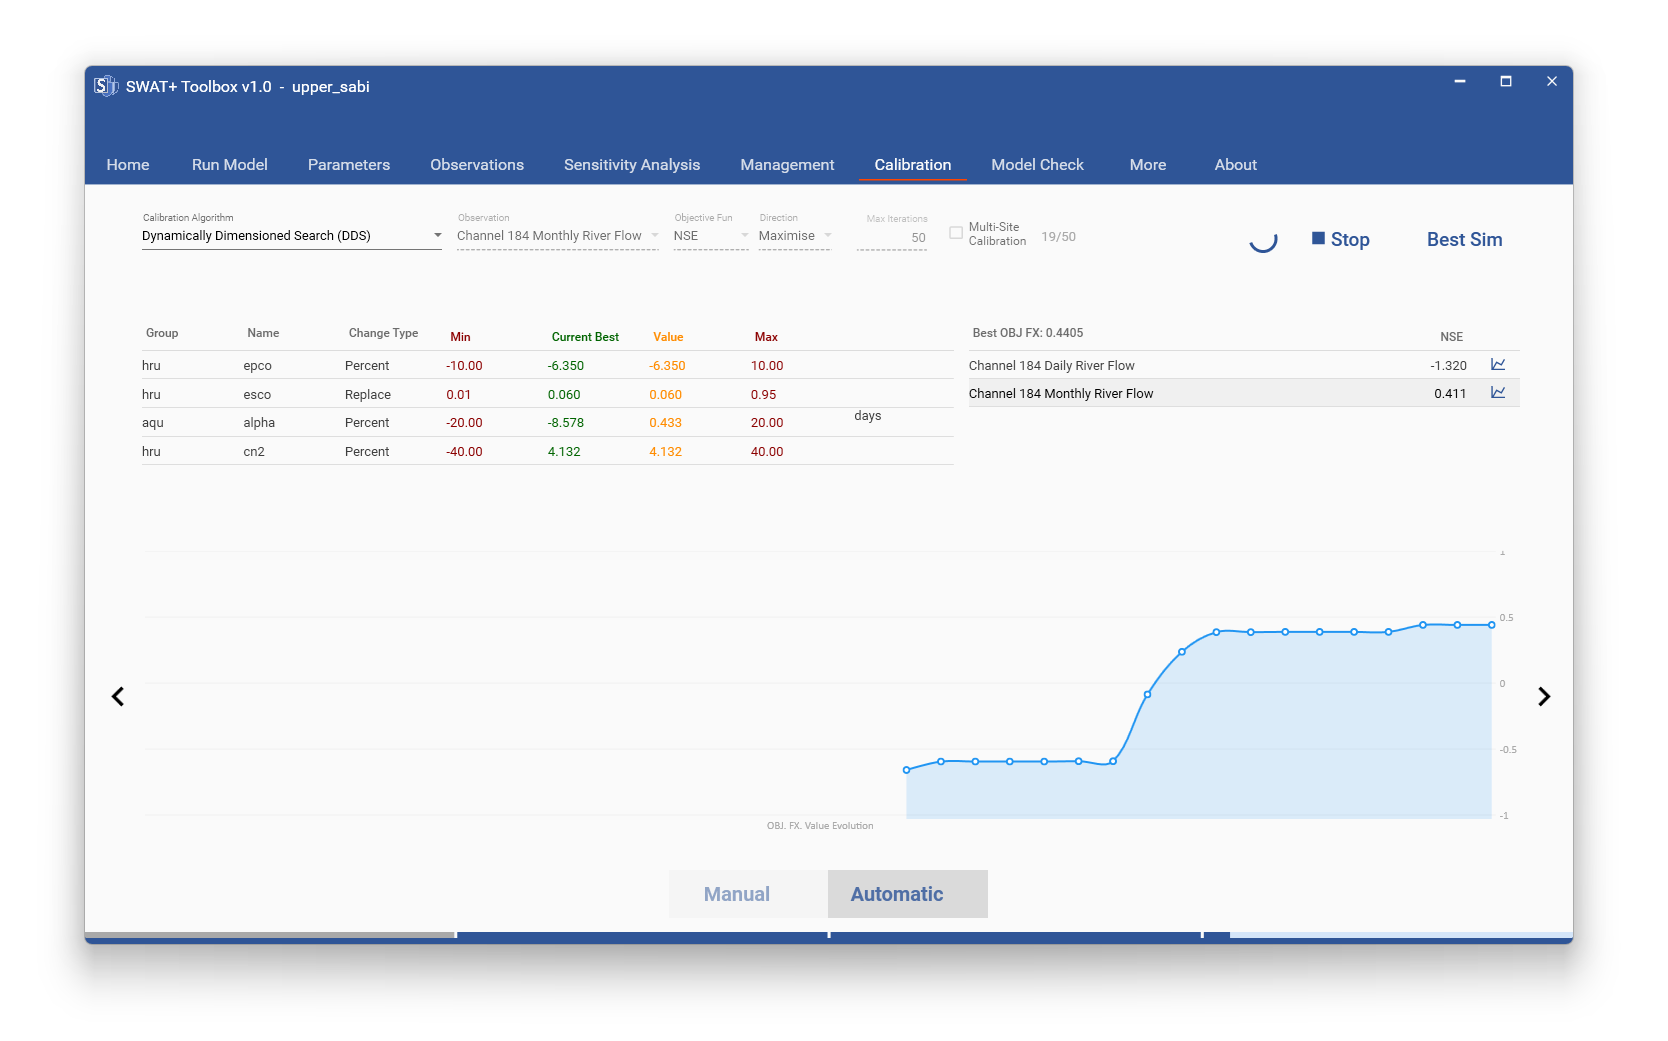
Fig. 14. Evolution of the best performance index in the monitoring panel during automatic calibration
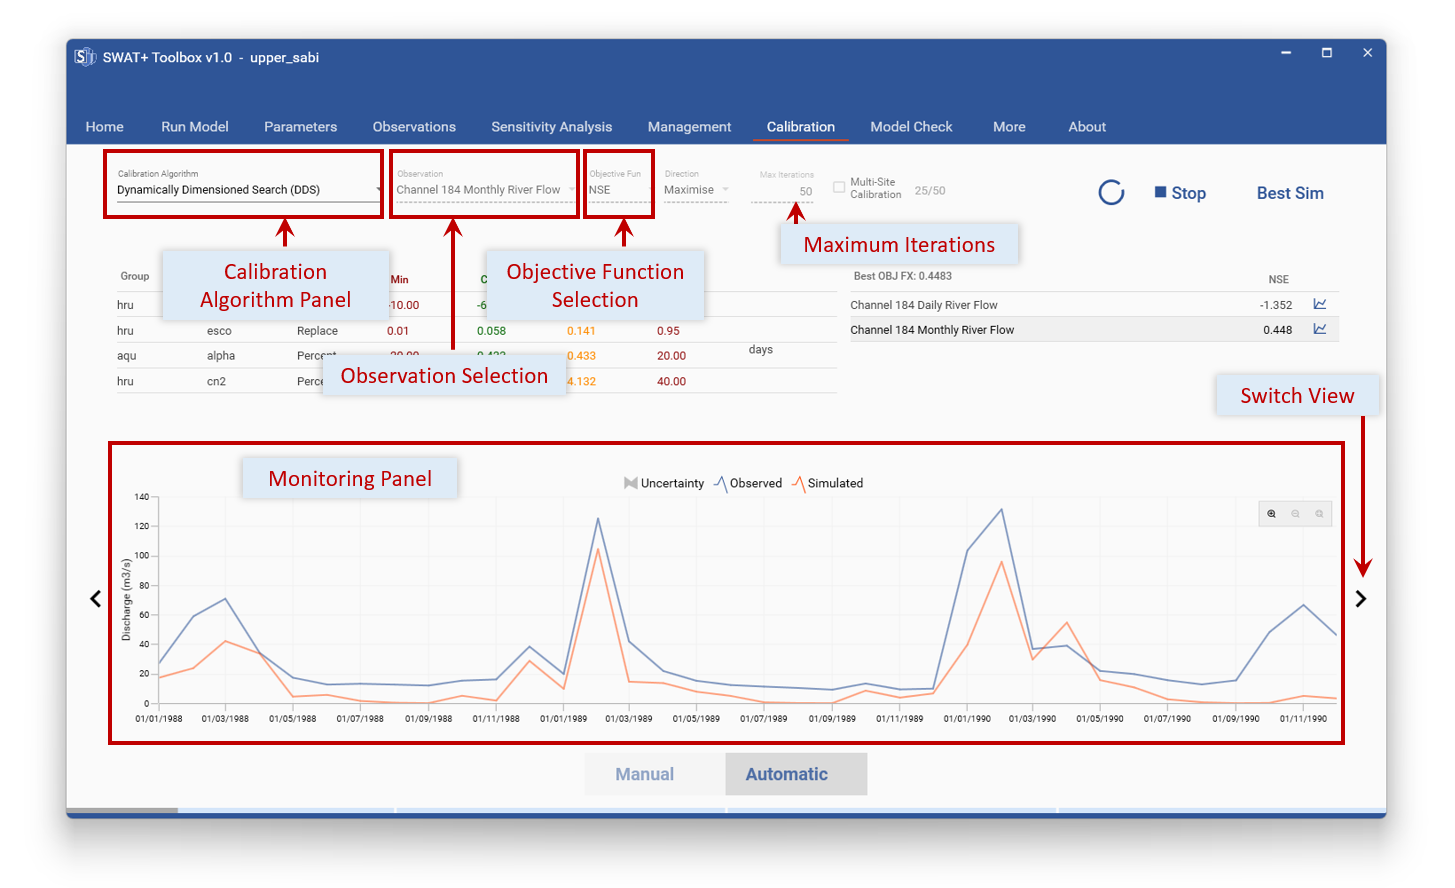
Fig. 15. Details of the Automatic Calibration Page
After Calibration is done, you can load the best simulation and parameters by clicking 'Best Sim'. If you used the Dream Algorithm, this will also load simulation uncertainty.